Create a Workflow
Build a workflow using the visual canvas editor.
Where to find it
- Workflow dashboard:
/workflows-task/dashboard - Workflow builder:
/workflows-task/<workflow-id>
Create flow
- Navigate to
/workflows-task/dashboard. - Click New Workflow in the sidebar.
- Enter a name in the modal and click Create.
- You are redirected to the workflow builder at
/workflows-task/<id>. - Build the pipeline on the canvas (see below).
- Click Save workflow to persist your changes.
Canvas overview
The builder opens with a default canvas containing two pre-placed nodes:
- Input — left side, defines inputs and the shared prompt template
- Output — right side, marks the end of the pipeline
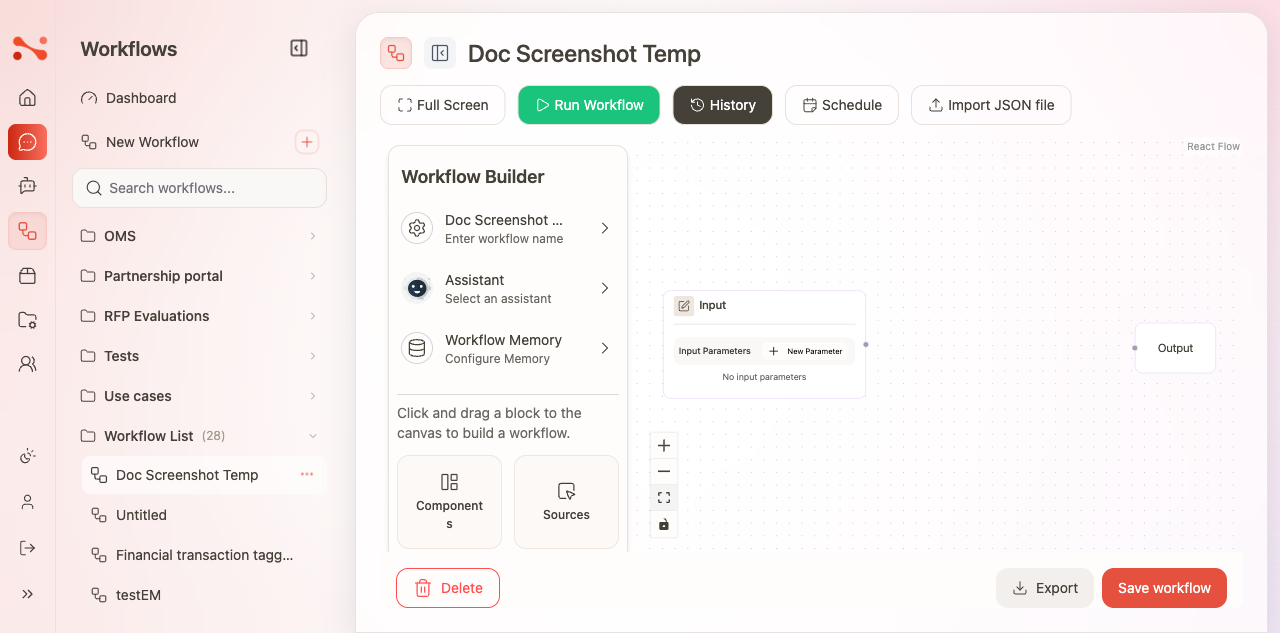
Toolbar actions
| Button | Action |
|---|---|
| Full Screen | Expands the canvas to fill the browser window |
| Run Workflow | Opens the run drawer to fill inputs and start a run |
| History | Opens the run history side panel |
| Schedule | Opens the schedule drawer to manage cron schedules |
| Import JSON file | Replaces the current canvas with an imported workflow JSON |
| Export | Downloads the current workflow as a .json file |
| Save workflow | Persists all canvas and settings changes |
| Delete | Deletes the workflow (requires confirmation) |
An Unsaved badge appears next to the workflow name when there are unsaved changes. It disappears after a successful save.
Building the workflow
Add a task node
- In the left panel, click Components to reveal the draggable node types.
- Drag one of the node types (Agent, Workflow, Orchestrator) onto the canvas.
- The node appears on the canvas, ready to configure.
Connect nodes
- Drag from the output handle of one node to the input handle of the next to create an edge.
- The execution path follows edges: Input → [task nodes] → Output.
- Nodes not connected to the Input node are not executed.
Configure a task node
Each task node has:
- Agent Name — a label for this step
- Prompt Template — the instruction sent to the LLM; use
{{parameter_name}}to insert input values - LLM drop zone — drag an LLM Chat Setting from the LLMs tab to assign a model
- Tools drop zone — drag tools to attach them (optional)
- Sources drop zone — drag document sources for RAG retrieval (optional)
A task node must have an LLM Chat Setting assigned before the workflow can be saved or run.
Delete a task node
Click the × button in the task node's header. The node and all its connected edges are removed simultaneously.
Workflow Settings panel
The left panel has a Workflow Builder collapsible section with three fields:
| Field | Description |
|---|---|
| Name | Display name of the workflow; shown in the sidebar and editor heading |
| Assistant | Optional — link this workflow to an assistant so runs can continue into chat |
| Workflow Memory | Configures the short-term and long-term memory token budget (see below) |
Workflow Memory
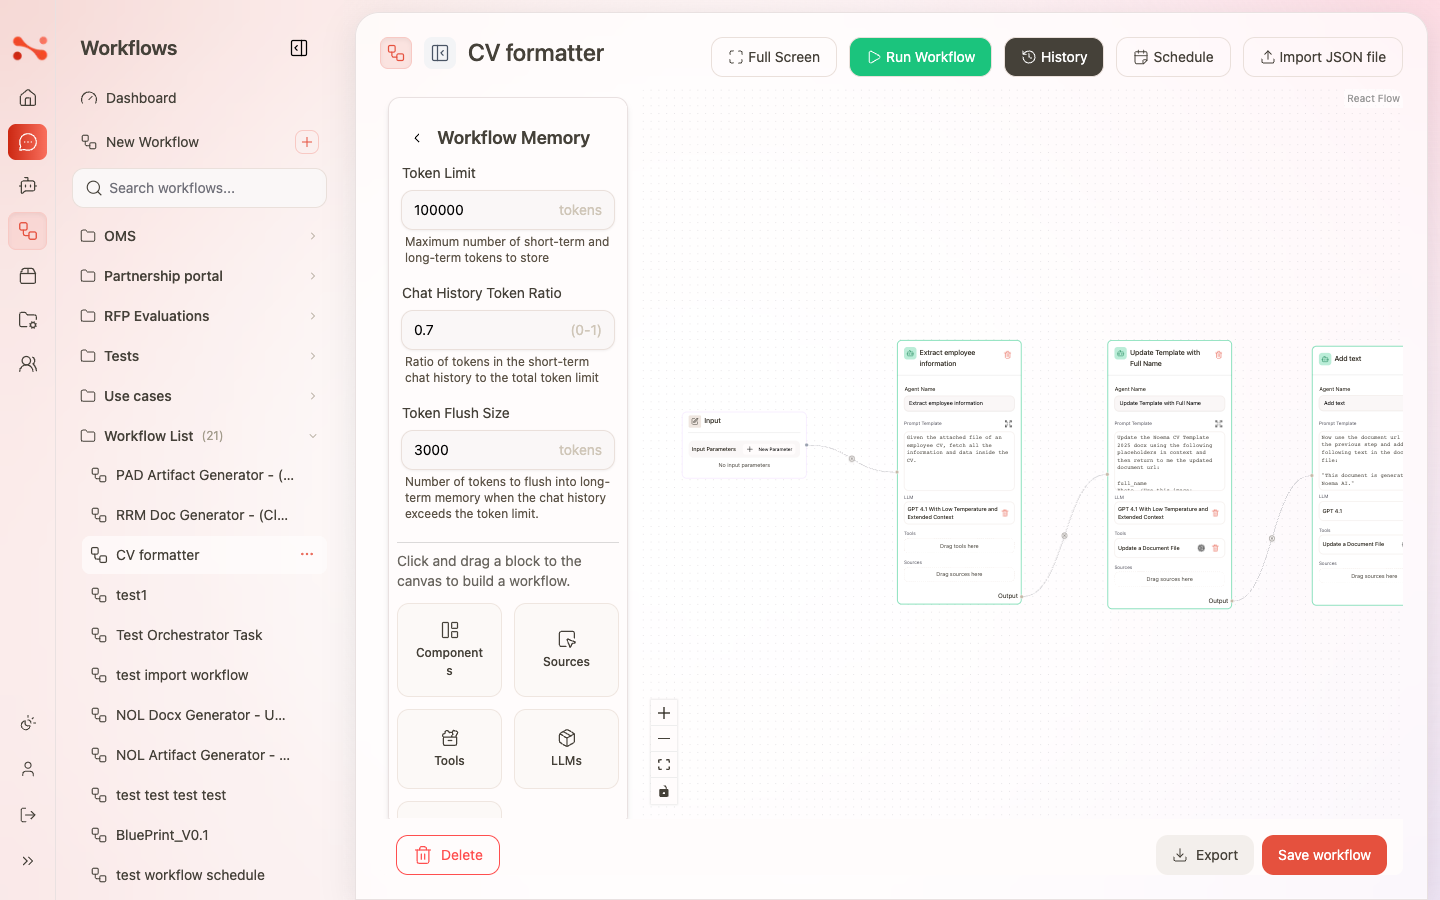
Expand Configure Memory to set three numeric fields:
| Field | Default | Description |
|---|---|---|
| Token Limit | 100000 | Maximum number of tokens for short-term and long-term memory |
| Chat History Token Ratio | 0.7 | Fraction of the token limit reserved for chat history (0–1) |
| Token Flush Size | 3000 | Tokens flushed to long-term memory when chat history exceeds the limit |
Sticky notes
Drag Sticky note from the Components panel onto the canvas to add a documentation element.
- Sticky notes do not execute — they are visual annotations only.
- Text you enter in a sticky note is saved with the workflow.
Schedule
Click Schedule in the toolbar to open the schedule drawer. From here you can:
- View existing schedules for this workflow
- Create a new schedule (New Schedule → name → cron recurrence)
- Edit or delete existing schedules via the schedule's Actions (three-dot) menu
Import and Export
Export
Click Export in the footer to download the workflow as a .json file named workflow-{name}.json. The current canvas state is exported, including node configuration, edges, and input parameters.
Import
Click Import JSON file in the toolbar to open the import panel.
- Drag and drop a
.jsonfile, or click the panel to select one. - The canvas is replaced with the imported workflow's structure.
- Only valid workflow JSON files are accepted.
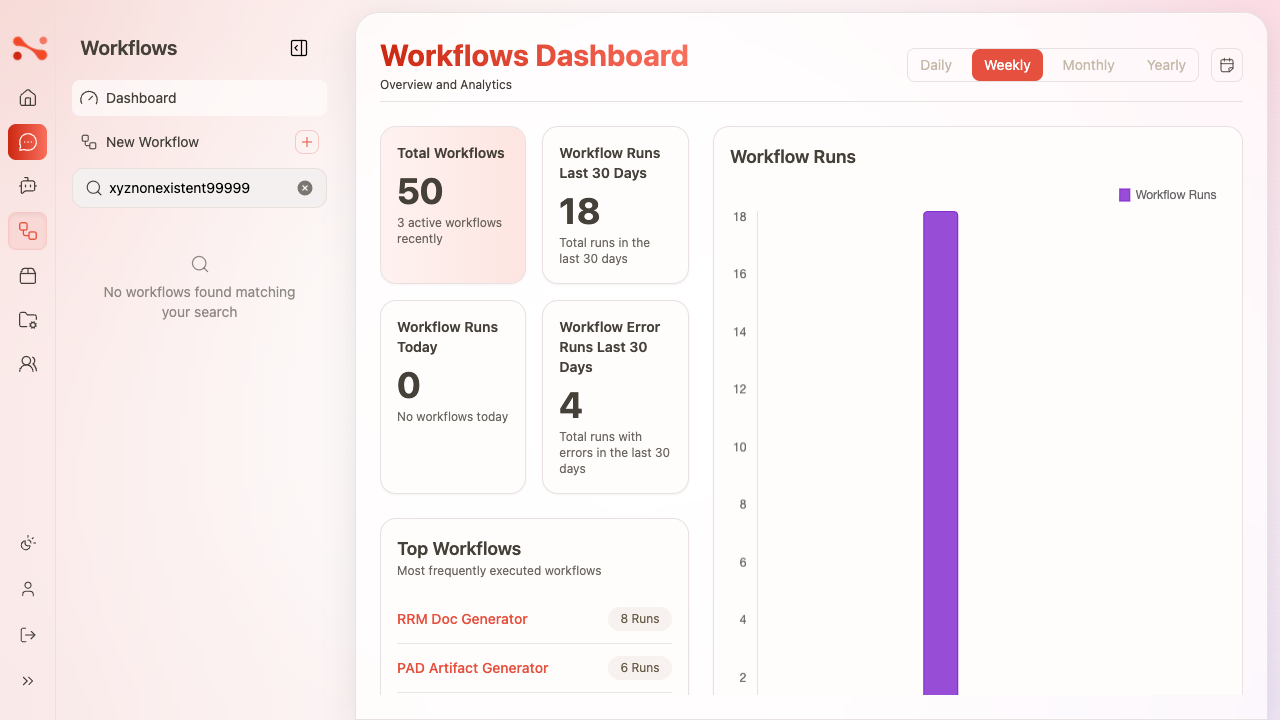
Search and empty state
The sidebar search on the workflow dashboard filters the list in real-time.
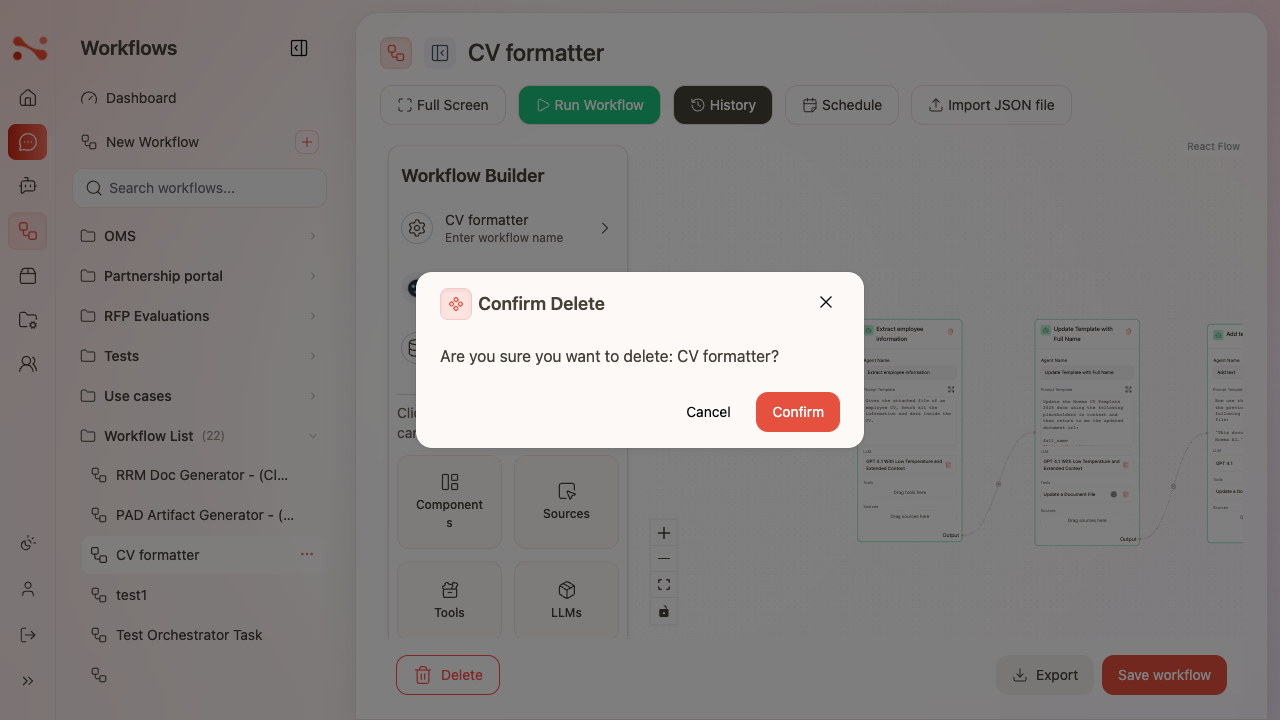
Delete a workflow
Click Delete in the toolbar (or the Actions menu on the dashboard card). A confirmation modal appears before the workflow is permanently removed.
Business rules
| Rule | Behaviour |
|---|---|
| Name required | Workflow cannot be created with an empty name |
| LLM required to save | Save is blocked if any task node has no LLM Chat Setting assigned |
| Connected graph to run | Nodes not connected to Input are not executed |
| Unique parameter names | Duplicate input parameter names are blocked with an inline error |
| Reserved parameter name | user_context cannot be used as a custom input parameter name |