Create an Assistant
Add a new AI assistant that users can chat with.
Where to find it
- Assistants dashboard:
/assistants-config/dashboard
Dashboard overview
The Assistants dashboard shows all your configured assistants alongside usage analytics.
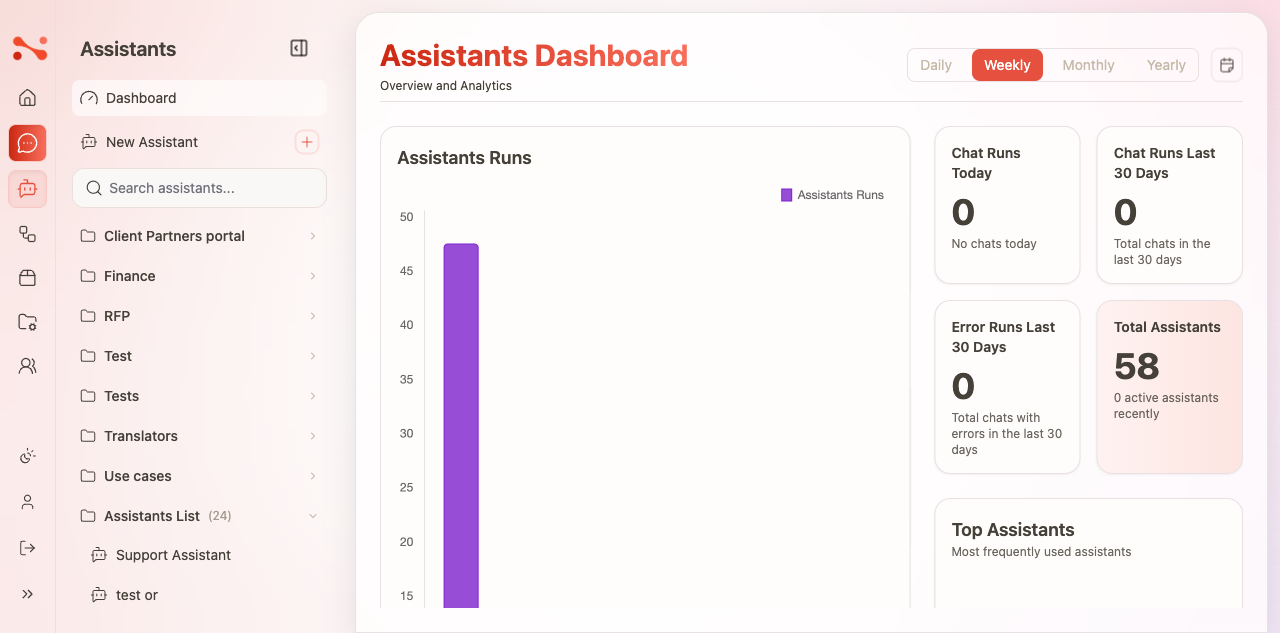
Analytics shown on the dashboard:
- Total Assistants — count of all configured assistants
- Chat Runs Last 30 Days — total conversations across all assistants
- Chat Runs Today — today's count
- Error Runs Last 30 Days — failed conversation attempts
- Top Assistants — most-used assistants by run count
- Tokens Consumed — cumulative LLM token usage
Create flow
- Navigate to
/assistants-config/dashboard. - Click New Assistant in the sidebar.
- Enter a name in the modal and click Create assistant.
- You are redirected to the assistant editor at
/assistants-config/\{id\}. - Configure the fields (see Update an assistant for the full field reference).
- Click Update Assistant to save.
Adding a workflow
A workflow is required for the assistant to process user messages. Each assistant has its own embedded workflow — it is created from within the assistant editor and does not appear in the Workflows section of the app.
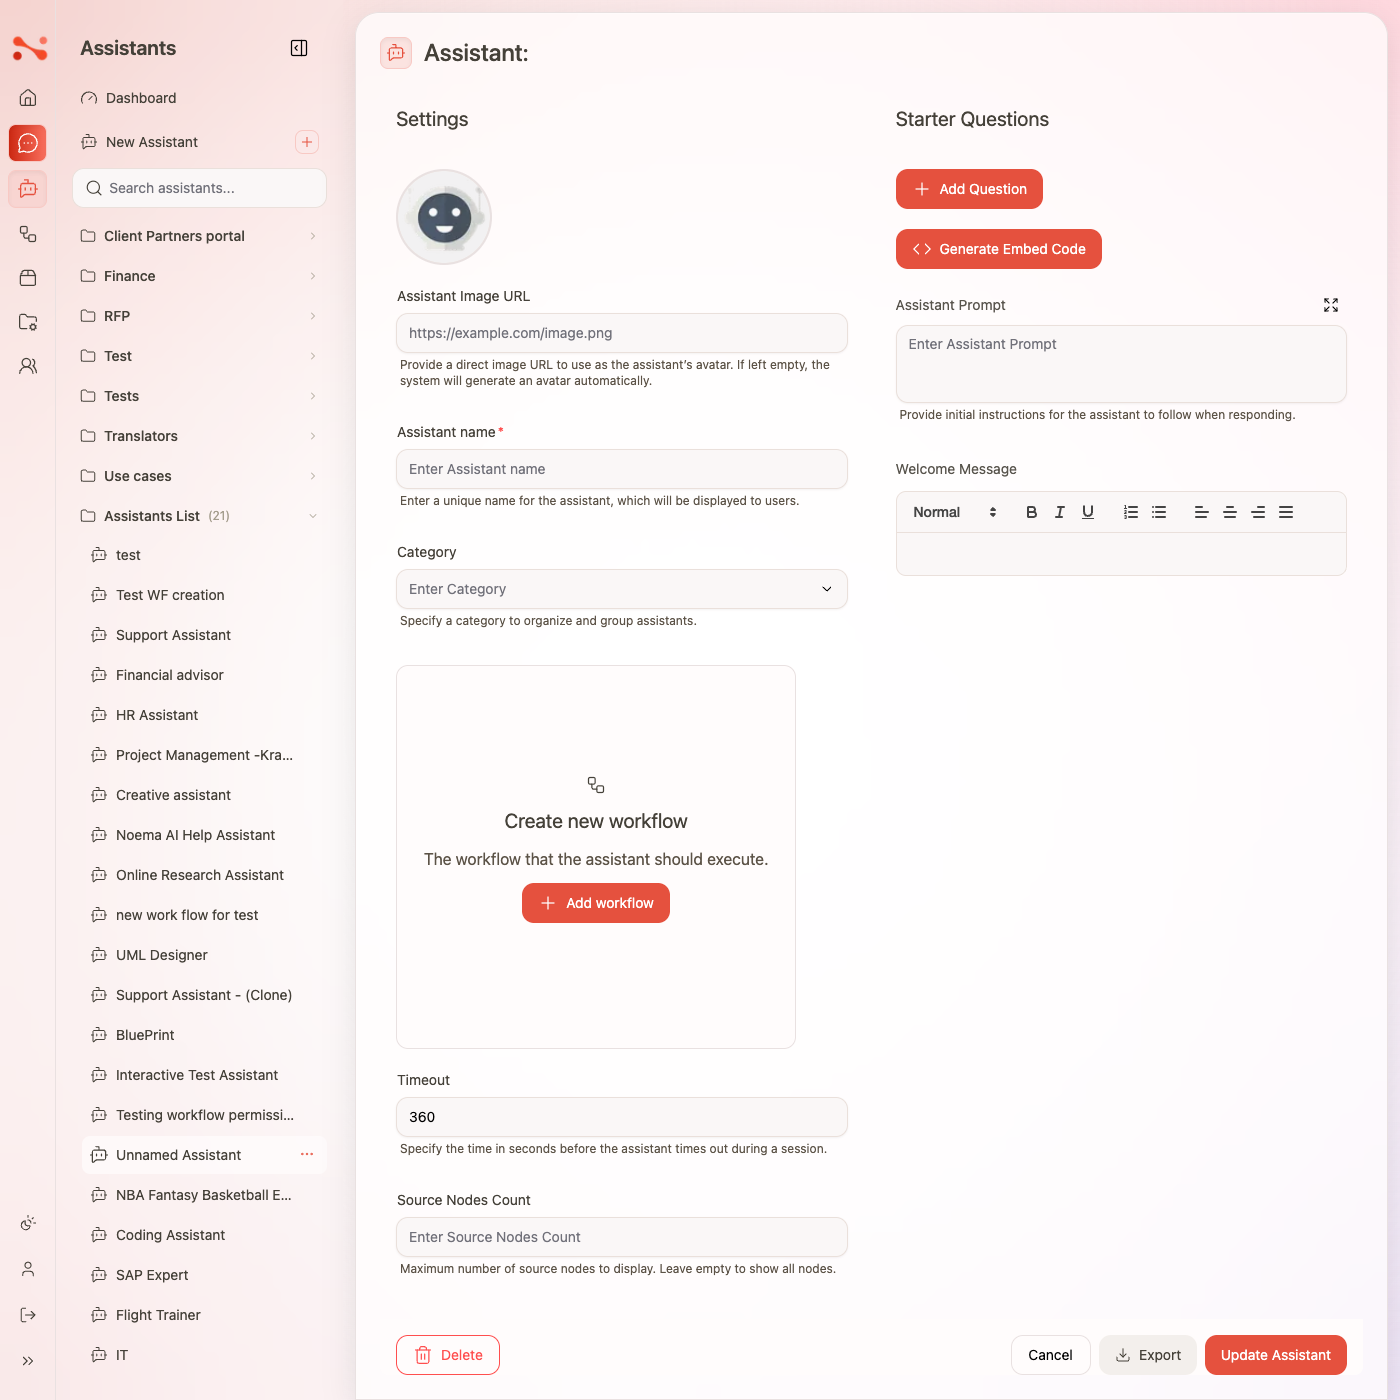
In the editor, the workflow section shows a "+ Add workflow" button when no workflow is assigned. Clicking it:
- Creates a new embedded workflow automatically named
\{assistant name\} Workflow. - Saves the assistant with the new workflow attached.
- Navigates to the workflow editor at
/assistants-config/\{id\}/workflow/\{workflowId\}where you configure the LLM pipeline.
Once a workflow is assigned, a workflow card replaces the placeholder. The card shows a mini canvas preview of the pipeline and lets you open the editor or remove the workflow.
This embedded workflow is private to the assistant — it will not appear in the Workflows section of the app.
After the workflow is created, configure it in the workflow editor — assign an LLM, attach sources or tools, and set the agent mode before saving.
Enabling the assistant
Toggle Enabled to make the assistant visible to end users. If you attempt to save with Enabled on but no workflow assigned, the save is blocked and a dismissible warning banner appears:
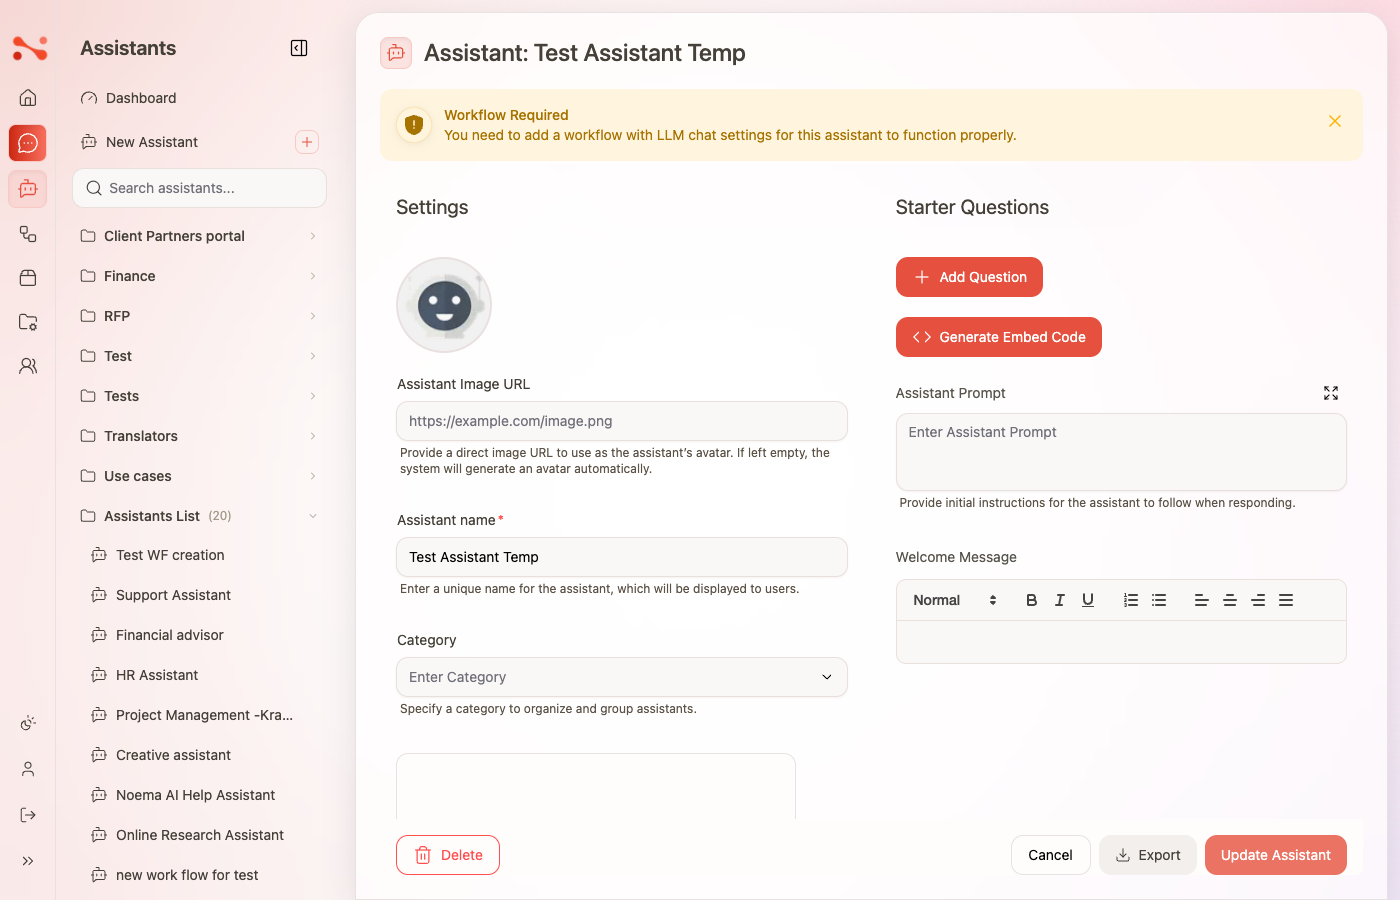
Workflow Required — You need to add a workflow with LLM chat settings for this assistant to function properly.
Dismiss the banner by clicking ×, add a workflow first, then save.
Business rules
| Rule | Behaviour |
|---|---|
| Name required | Inline error "Assistant name is required" if submitted empty |
| Enable requires Workflow | Save is blocked client-side; dismissible warning banner shown |
| Delete requires confirmation | Modal: "Are you sure you want to delete: {name}?" before removal |
| Embedded workflow not in Workflows list | The workflow created via "+ Add workflow" has type agent and is filtered out of the Workflows section |